

Post by John Shelley on Sept 9, 2016 21:10:23 GMT -5
I think some of you know that I have gone above and beyond just collecting fans as I have also made special custom ones out of spare parts or to fit a specific location. This is going to be the build log of my second 'Iconofan' it has actually taken me 2 years to nearly perfect this fan.
First off some background info about why I did this, about 25 minutes awy from me is monastery that had only started up about 2 and half years ago. They have barn that they wanted to convert to chapel that had no electric on the upper floor so I took care of that in the summer of 2014, natually it was very hot then which lead to me wanting to make special fan for it similar to the Iconofan in my own living room.
Next a video about the fan.
Now with that out of the way I'll explain how i did this.
To start off the fan i used for this was later model Emerson 1895 series in white that had "rounded" tip blades that I found cheap on ebay. I went for that despite it being the wrong color for the simple reason that its a stack motor fan with out a rubber flywheel, so not much could break on it.
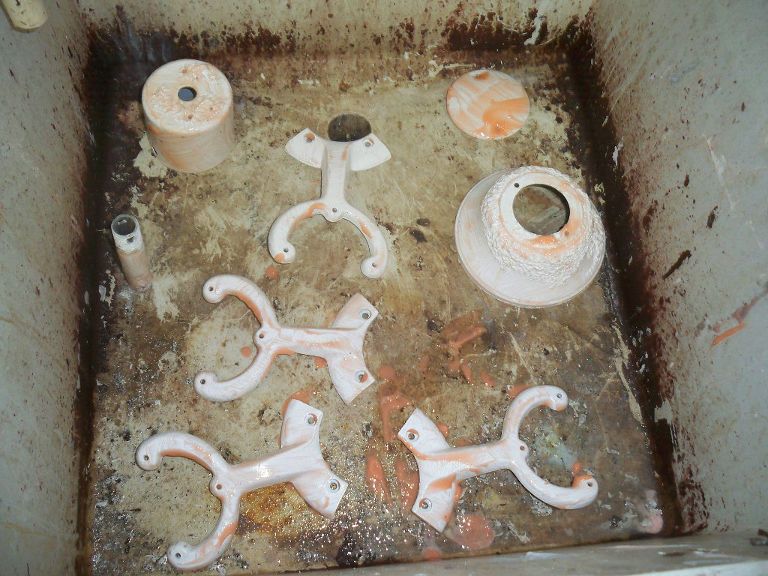
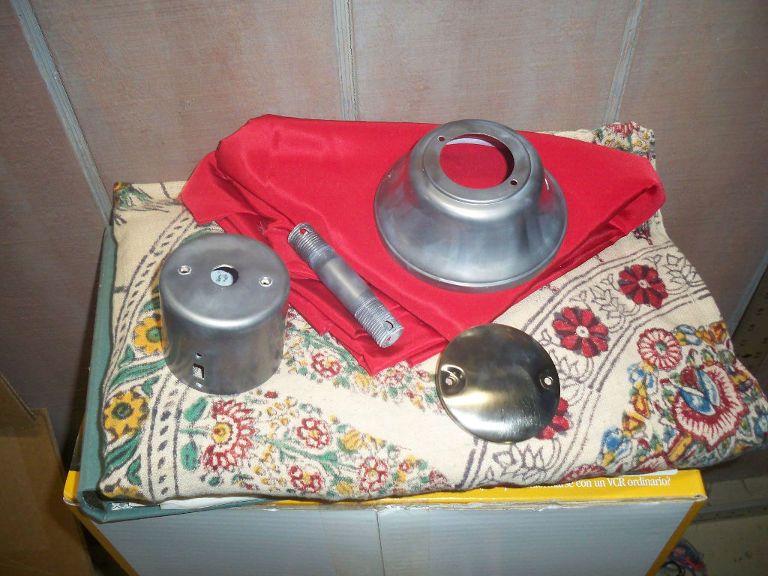
Since I needed fan that looked brass the first thing I had to do was disassemble the fan strip the paint off all the parts. I just used the citrus stripper for the most part as it works rather well on 80's Emerson paint.
With that done then the modifications to the motor housing could begin. For anyone that renumbers the first Iconofan one important thing about it was that It has both uplights and a sort of 'crown' on top of the motor housing. So I would have to modify the top of housing to accommodate them. It was the uplight that made a stack motor fan necessary for this project. The first step was easy and that was to drill 4 holes for the sockets.
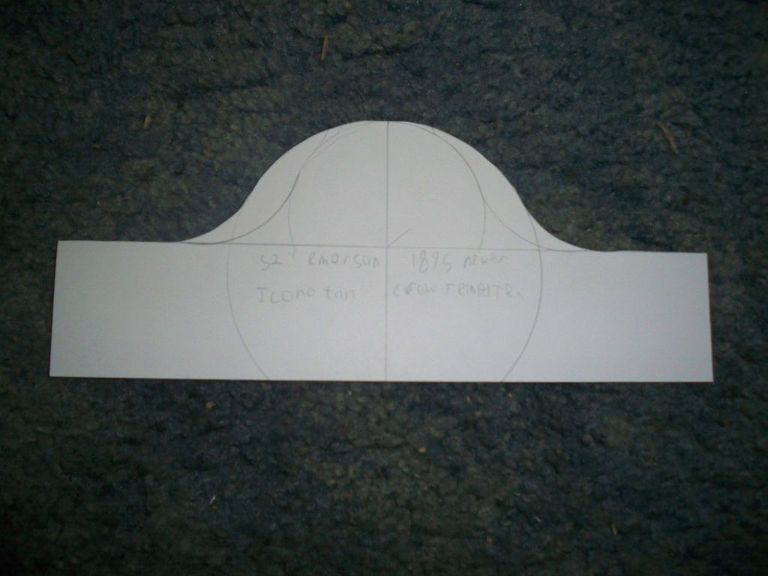
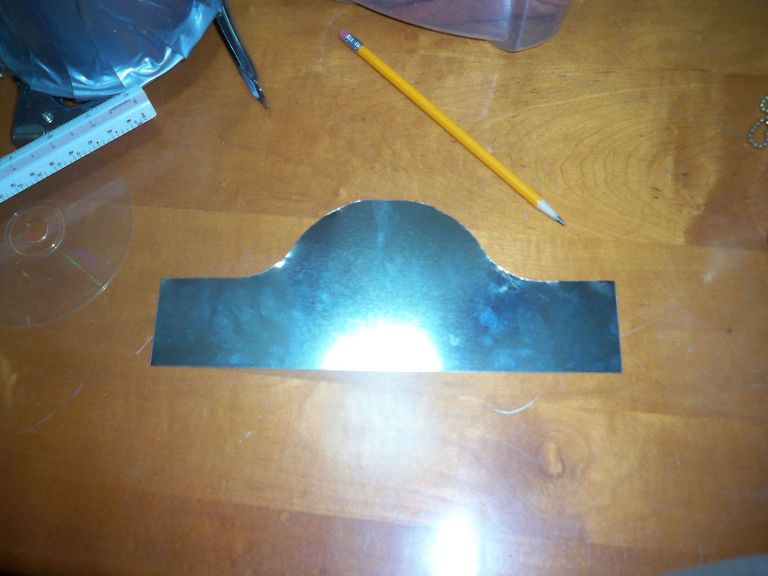
The next few steps were not quite so easy, first of all I had to make the 4 side panels for the crown they trick was to first draw a paper template and then stick that to the sheet metal as cutting guide.
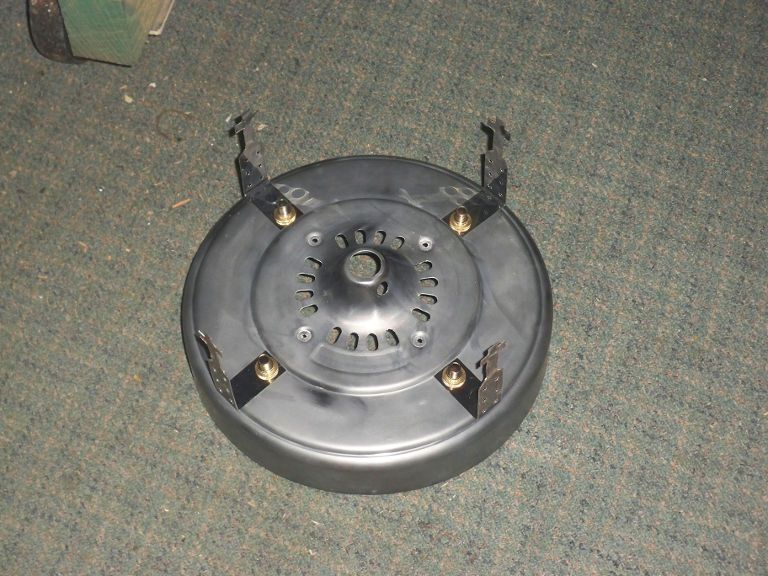
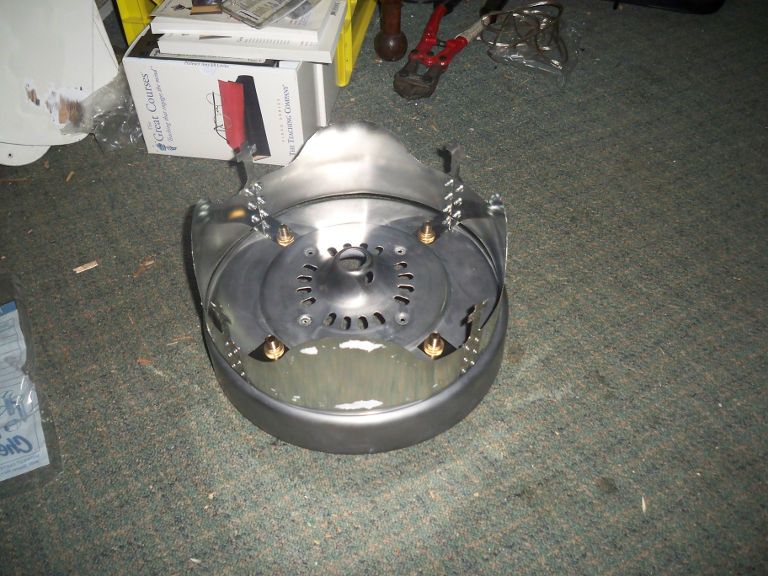
I also had to make 4 straps to hold them to the motor, unfortunately I don't have any pictures of the construction of those but I do have on of them attached to the top housing, note how the tops of them are cross shaped.
Once all Those pieces were done I drilled the 4 side panels of the crown and riveted them to the straps.
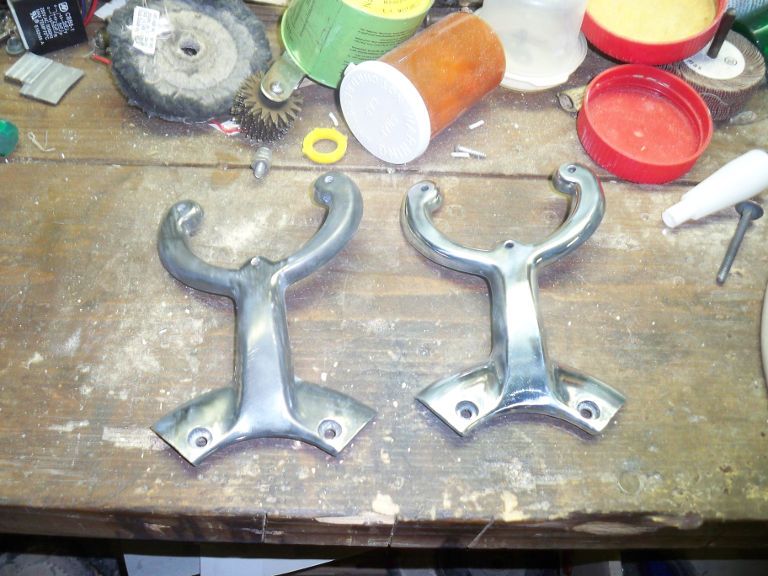
With the fabrication done It was time to polish all the parts, I use a buffer for that. This image shows a before and after on the blade arms.
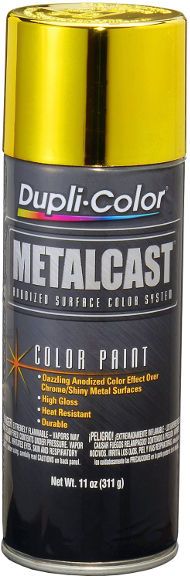
After all the parts were polished it was time to paint the metal to make it look like brass, for that I used a Special transparent yellow paint.
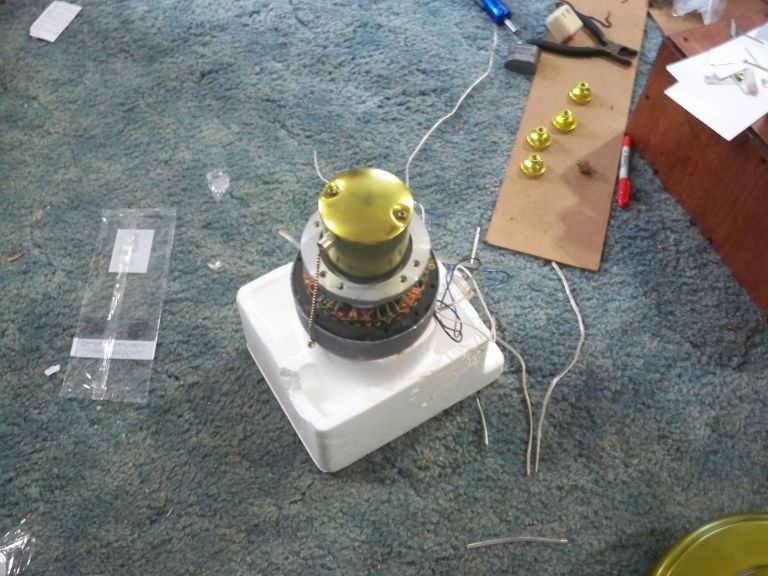
Of course paint takes while to cure fully so I did some other thing while waiting on it to do so. First of all I added extra wiring to the motor for the up light.
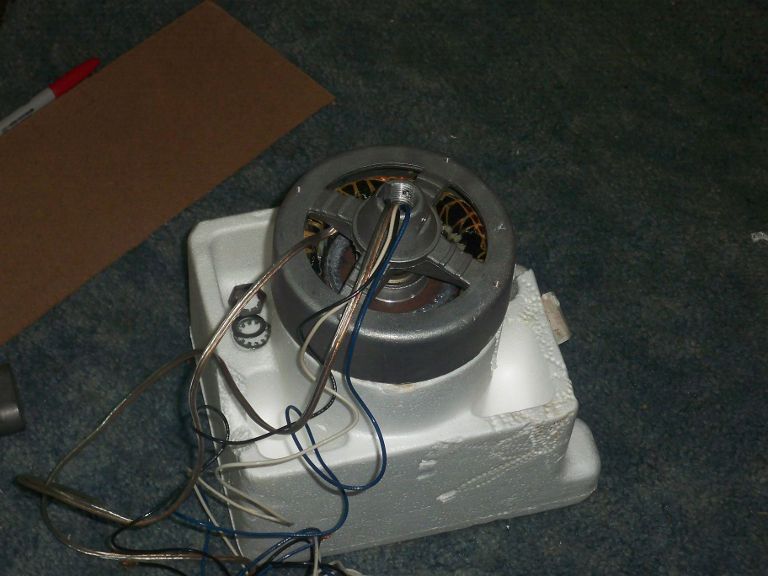
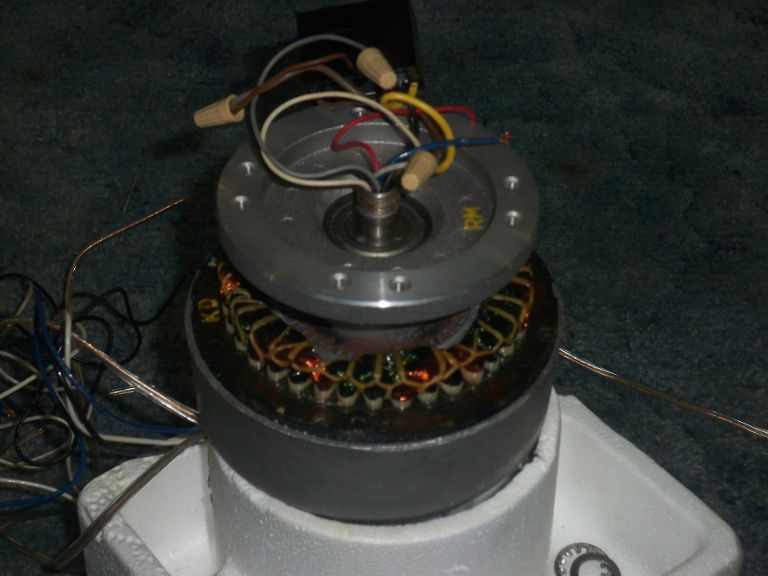
For anyone wondering what KB55 looks like that picture and the next one should give you a pretty good idea, and .I both counted the poles and did no load tachometer test of this motor and I came to the rather surprising conclusion that this mote is not 18 pole both rather a 12 pole motor.
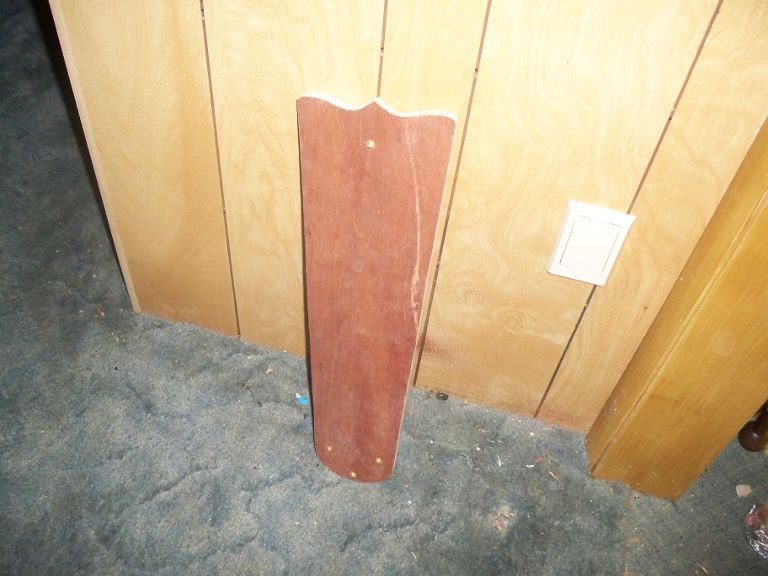
With the wiring and painting out of the way I turned my attention to the blades, now this proved to be a mess, I don't know what Emerson had sued to make high gloss white blades in the 80's but it just about refused to come off. TO make matters rose where it did come off I discovered to my disgust that they had fake wood grain over top of plywood, what oh what were you thinking Emerson. All that mead me give up on the Plan A of refinishing the blades, Instead I made a new set out of 1/8in plywood that happened to have lit wood on one side and dark on the other which saved the time of having to stain them. I was able to make the ones I made little bit longer than the originals and also made them wingtip to make the fan look older.
Finally the parts were dry and they do look good even though the end result is sorta between polished and antique brass.
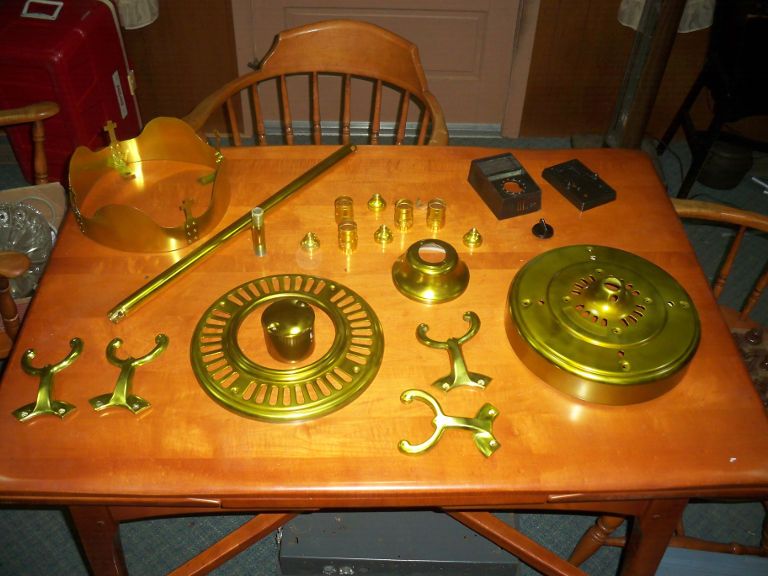
So finally I could get to reassembly, first the switch housing went back on the the entire motor housing and crown went on as a unit.

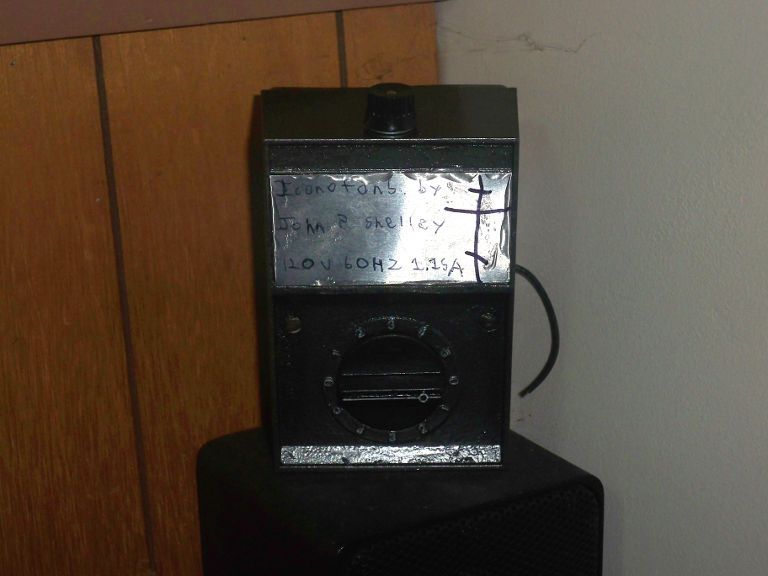
I also had made a custom 5 speed control with an extra switch for the uplight and my own label.
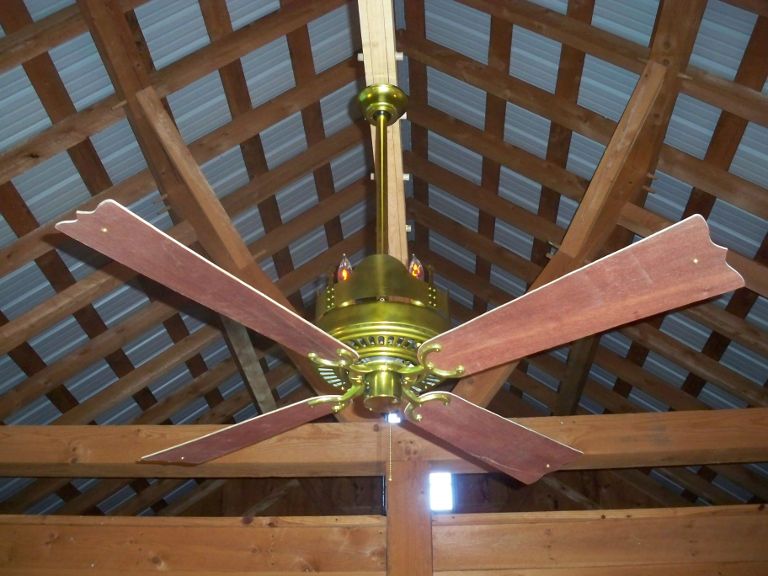
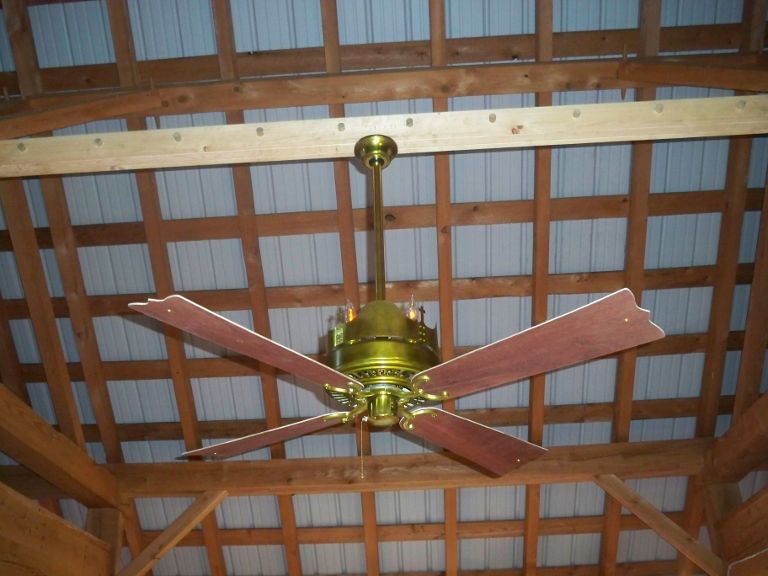
With all that done it was time to install the fan, and this had its on challenges, for one I had to make custom beam to span the space when the fan was going to go, again I don't have any images of the construction of it but, I can describe it. It's made out of par of 2x4s sandwiched between 1x4s with the joints of the 1x4's staggered from the joint in the 2x4s by 4 feet the different layers are held together by 3/4in dowel pins. Pulse for further reinforcement the electrical box is bolted all the way through the central joint to a metal plant on the top side of the beam. I have 2 images showing the fan after it was hung on the beam, the install would certainly at that time have qualified as a cool one.
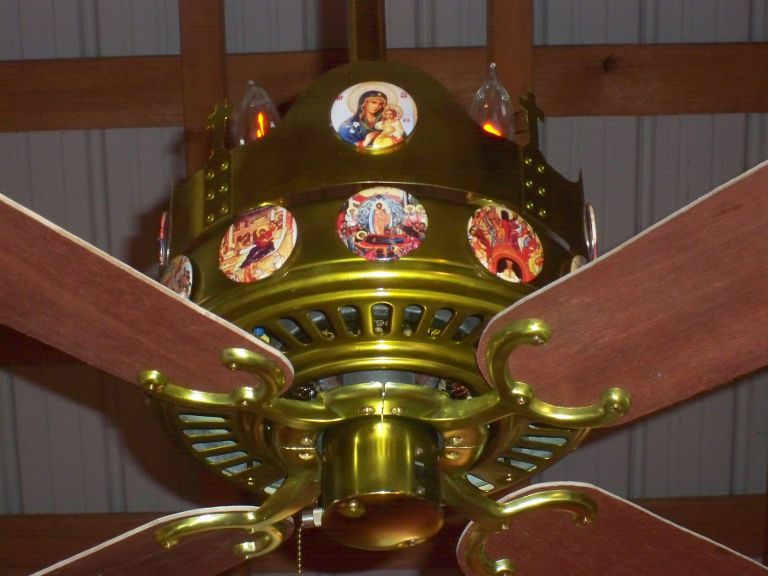
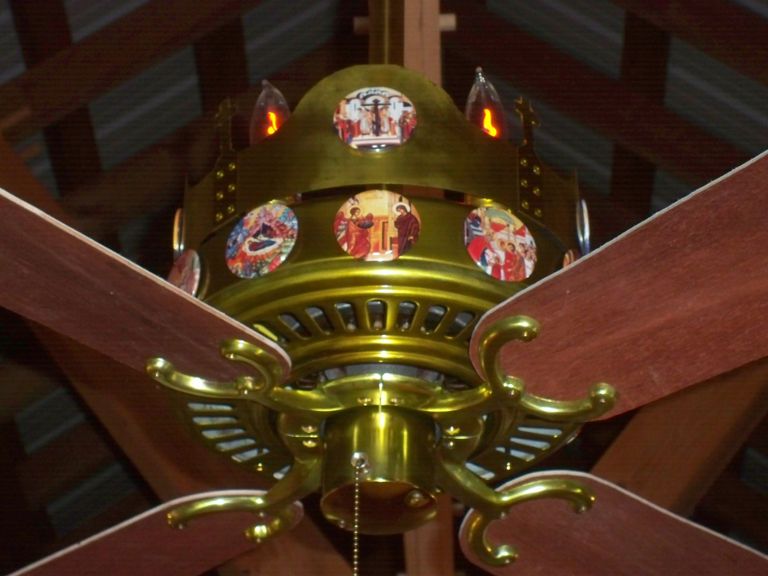
With it up I put the Icons on it 4 images this time;
South side

North Side
East side
West side

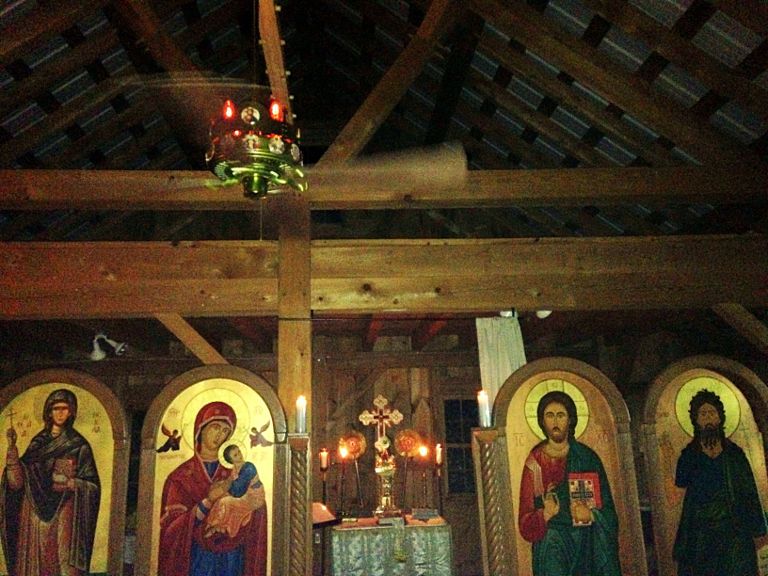
And here is the fan during the first service held in the chapel back in September of 2014
But the work on this fan does not end there.
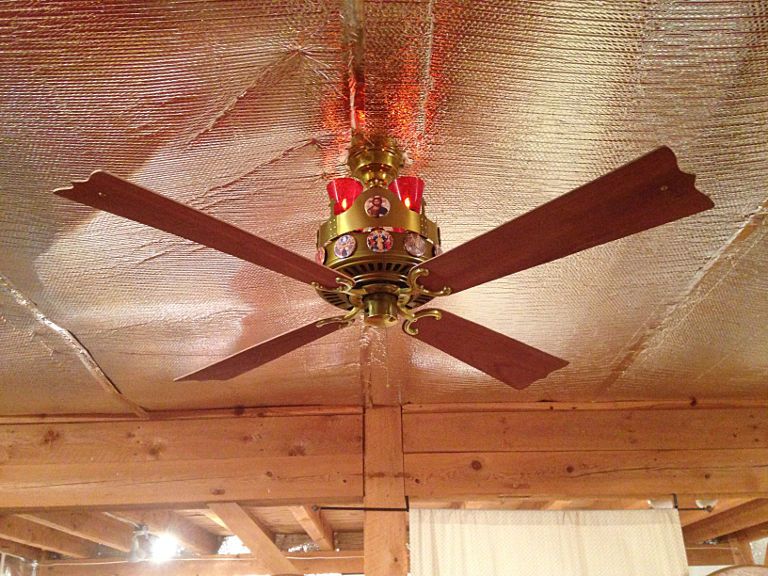
During the winter insulation was added to this building, do to the way it was done the downrod had to go though it. So I polished up and painted a spare hunter original canopy like I had done for the rest of the fan and out it on the down rod to make the pass through look nicer. Then in the summer I changed the unreliable neon flicker flames to led ones and also put clear red plastic cups around them, in order to make them look more like red votive oil lamps. so here is how it looked in summer of 2015.
But I still wasn't done, this year I decided to do something I had wanted to do all along with this fan, and that is stencil the blades I think now you can tell why I had started this thread ada19851985.proboards.com/thread/10451/stenciled-blades
So now let me show you how that went, first the inspiration for the pattern I came up with.

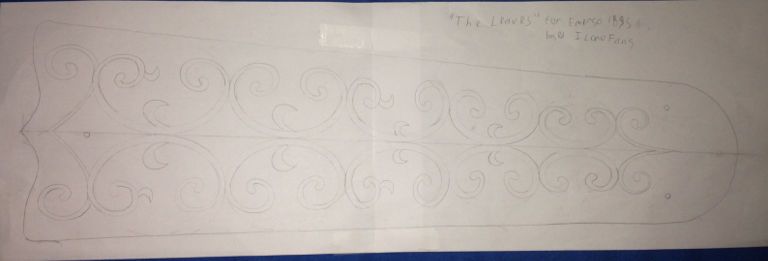
That is the wrong shape for the blades but its the look I was after. To make my own I traced a blade on paper and then dew up my verison of my design using some craft stuff my mom has to help keep the lines smooth sorry that it looks faint in the image.
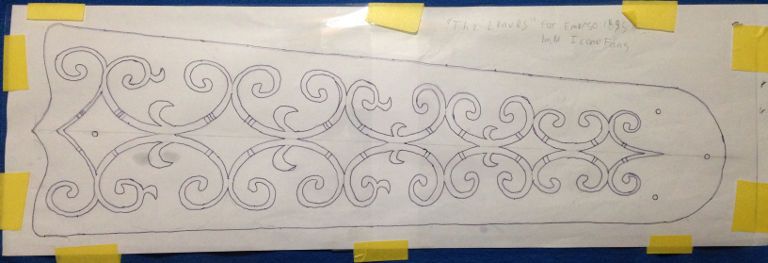
Then I taped clear acetate sheet to the paper and traced the patter on that, it shows up much clearing on this due to using an ultra fine point sharpie for this.
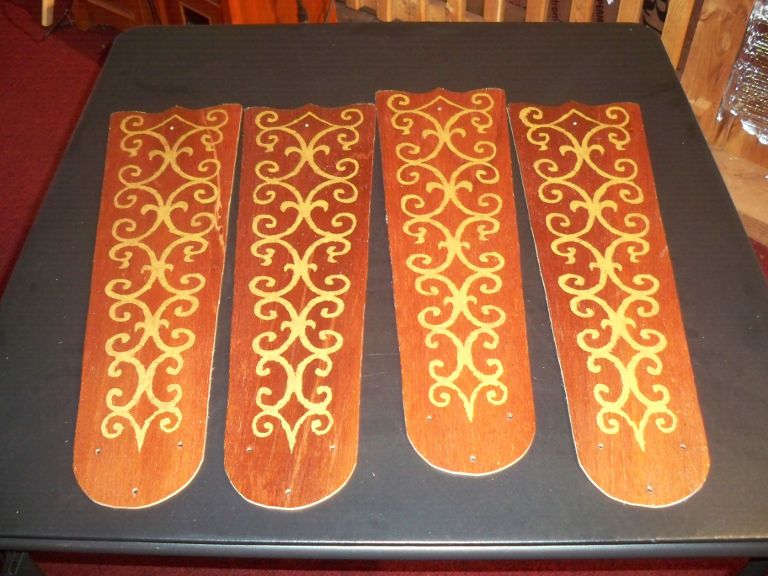
After than I carefully cut out the patter and used it to paint the design to the blades.
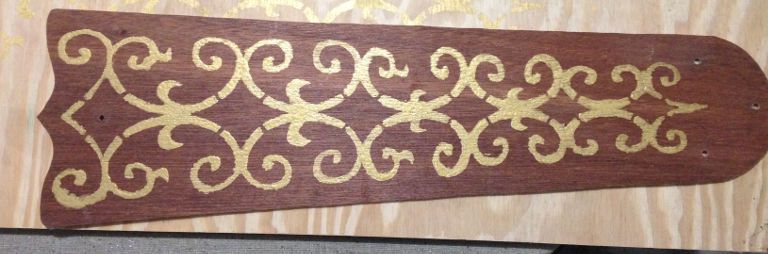
After the paint dried I varnished the blades.
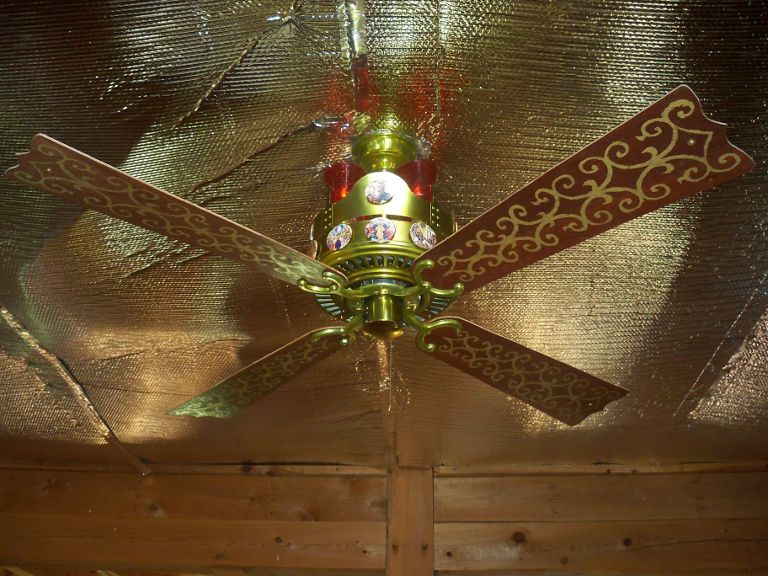
Finally after giving a day and half for the varnish to cure I put the blades back on the fan, and here is the end result.
First off some background info about why I did this, about 25 minutes awy from me is monastery that had only started up about 2 and half years ago. They have barn that they wanted to convert to chapel that had no electric on the upper floor so I took care of that in the summer of 2014, natually it was very hot then which lead to me wanting to make special fan for it similar to the Iconofan in my own living room.
Next a video about the fan.
Now with that out of the way I'll explain how i did this.
To start off the fan i used for this was later model Emerson 1895 series in white that had "rounded" tip blades that I found cheap on ebay. I went for that despite it being the wrong color for the simple reason that its a stack motor fan with out a rubber flywheel, so not much could break on it.
Since I needed fan that looked brass the first thing I had to do was disassemble the fan strip the paint off all the parts. I just used the citrus stripper for the most part as it works rather well on 80's Emerson paint.


With that done then the modifications to the motor housing could begin. For anyone that renumbers the first Iconofan one important thing about it was that It has both uplights and a sort of 'crown' on top of the motor housing. So I would have to modify the top of housing to accommodate them. It was the uplight that made a stack motor fan necessary for this project. The first step was easy and that was to drill 4 holes for the sockets.

The next few steps were not quite so easy, first of all I had to make the 4 side panels for the crown they trick was to first draw a paper template and then stick that to the sheet metal as cutting guide.


I also had to make 4 straps to hold them to the motor, unfortunately I don't have any pictures of the construction of those but I do have on of them attached to the top housing, note how the tops of them are cross shaped.

Once all Those pieces were done I drilled the 4 side panels of the crown and riveted them to the straps.

With the fabrication done It was time to polish all the parts, I use a buffer for that. This image shows a before and after on the blade arms.

After all the parts were polished it was time to paint the metal to make it look like brass, for that I used a Special transparent yellow paint.
Of course paint takes while to cure fully so I did some other thing while waiting on it to do so. First of all I added extra wiring to the motor for the up light.

For anyone wondering what KB55 looks like that picture and the next one should give you a pretty good idea, and .I both counted the poles and did no load tachometer test of this motor and I came to the rather surprising conclusion that this mote is not 18 pole both rather a 12 pole motor.

With the wiring and painting out of the way I turned my attention to the blades, now this proved to be a mess, I don't know what Emerson had sued to make high gloss white blades in the 80's but it just about refused to come off. TO make matters rose where it did come off I discovered to my disgust that they had fake wood grain over top of plywood, what oh what were you thinking Emerson. All that mead me give up on the Plan A of refinishing the blades, Instead I made a new set out of 1/8in plywood that happened to have lit wood on one side and dark on the other which saved the time of having to stain them. I was able to make the ones I made little bit longer than the originals and also made them wingtip to make the fan look older.

Finally the parts were dry and they do look good even though the end result is sorta between polished and antique brass.

So finally I could get to reassembly, first the switch housing went back on the the entire motor housing and crown went on as a unit.


I also had made a custom 5 speed control with an extra switch for the uplight and my own label.

With all that done it was time to install the fan, and this had its on challenges, for one I had to make custom beam to span the space when the fan was going to go, again I don't have any images of the construction of it but, I can describe it. It's made out of par of 2x4s sandwiched between 1x4s with the joints of the 1x4's staggered from the joint in the 2x4s by 4 feet the different layers are held together by 3/4in dowel pins. Pulse for further reinforcement the electrical box is bolted all the way through the central joint to a metal plant on the top side of the beam. I have 2 images showing the fan after it was hung on the beam, the install would certainly at that time have qualified as a cool one.


With it up I put the Icons on it 4 images this time;
South side

North Side

East side

West side

And here is the fan during the first service held in the chapel back in September of 2014

But the work on this fan does not end there.
During the winter insulation was added to this building, do to the way it was done the downrod had to go though it. So I polished up and painted a spare hunter original canopy like I had done for the rest of the fan and out it on the down rod to make the pass through look nicer. Then in the summer I changed the unreliable neon flicker flames to led ones and also put clear red plastic cups around them, in order to make them look more like red votive oil lamps. so here is how it looked in summer of 2015.

But I still wasn't done, this year I decided to do something I had wanted to do all along with this fan, and that is stencil the blades I think now you can tell why I had started this thread ada19851985.proboards.com/thread/10451/stenciled-blades
So now let me show you how that went, first the inspiration for the pattern I came up with.

That is the wrong shape for the blades but its the look I was after. To make my own I traced a blade on paper and then dew up my verison of my design using some craft stuff my mom has to help keep the lines smooth sorry that it looks faint in the image.

Then I taped clear acetate sheet to the paper and traced the patter on that, it shows up much clearing on this due to using an ultra fine point sharpie for this.

After than I carefully cut out the patter and used it to paint the design to the blades.

After the paint dried I varnished the blades.

Finally after giving a day and half for the varnish to cure I put the blades back on the fan, and here is the end result.


