|
|
Post by Jean Lemieux on Jul 27, 2010 1:38:02 GMT -5
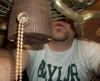
Yeah after 7 months since I got it! The previous brackets were very messed up, overpitched and bent down. It wobbled like crazy on high and medium! I even broke one trying to bent them back. Two weeks ago I received some ceiling fans parts from Kelly. A different set of PB Zephyr brackets, a new flywheel and a set of 5 generic classic half moon 42'' brackets. They were white, I repainted them in red with some glossy spray paint and the red I found is miraculously almost the same as the original one from the fan. The one on the fan have slightly more yellow in it and the spray one I got have slightly more white in it so the brackets looks slightly more pinkish while the fan a little more orange but still you can barley see the difference when installed. The thing you notice the most is not the color but more the different finish. Spray paint will always make a more matte finish compare to the original manufacture paint. The new brackets have a sightly longer arm than the original ones. The fan still measure 42'' though. Maybe it was a 40'' before.  A universal black mounting bracket fitted a little too loose and the fan still wobbled too much on high so I had to use the one from my 4 Seasons Montego(those mounting brackets are golden steel). Luckily I'm not planning to install the Montego anywhere any soon. The bracket the Montego uses(same as the one on the Top Mount too) is definitely the same that this red would have originally cammed with(its missing it). That red fan uses the same canopy, downrod mounting style and everything as the Top Mount and Montego and yes the wobble is reduced a lot with this mounting bracket and fits tighter too. Still have a wobble on high but not dangerous or violent anymore. Totally wobble free on low and medium. SUPER SILENT for a 24 yrs old fan! It should be installed in my sister new apartment in less than two weeks. Its supossed to have 10' ceilings and the building is not any newer than the 1930s(probably a lot older). She is coming back to big city Montréal! She spend the two last years in Trois-Rivières. She is supossed to move in her new freshly painted apt on August 1st. She will start her University studies this fall. I told her that this fan will treat her better than the crappy AirWorks huggers she have in her Trois-Rivières apt.   |
|
|
|
Post by JW on Jul 27, 2010 6:55:37 GMT -5
It looks like it just came out of the factory, at least in the picture. Well done.
|
|
|
|
Post by Tais on Jul 27, 2010 7:51:03 GMT -5
looks great!!!! i haven't seen it's original color.. it would best fit in a girl's room or a pink colored room  |
|
|
|
Post by Andrew G. on Jul 27, 2010 11:08:33 GMT -5
It looks like it just came out of the factory, at least in the picture. Well done. It looks like it just came out of a Dairy Queen..  |
|
|
|
Post by Cole S. on Jul 27, 2010 11:27:56 GMT -5
Very well done, but I expected as much because you always do really good paint jobs.
|
|
|
|
Post by Perrey Z. on Jul 27, 2010 16:15:39 GMT -5
Great Work! At first I though it was purchase like that.
|
|
|
|
Post by Jean Lemieux on Jul 28, 2010 2:14:49 GMT -5
Thanks! The canopy is still banged up a little. Yeah it does indeed look like a restaurant fan. Would look really good in a Pizza Hut or Dairy Queen. I forgot to mention that I got the motor screws from David at Entraide Mercier. They came from a 1991 white Canarm that he was going to trash anyway. I told my sister that after she moves again from that apt(she is only planning to stay there 1 year) I told her that the condition for her to have this fan is that she have to keep the fan and not leave it behind. Anyway she loves it too much to leave it behind. I will also keep an eye on it when I will visit her and tell her what to NOT do to it so it does not get abused. I will install it for her and take it down when she will want to move again. |
|
|
|
Post by Rick M. on Jul 31, 2010 19:43:41 GMT -5
Wow, it looks like new!  ;D Nice job, Jean! |
|
|
|
Post by Jean Lemieux on Aug 15, 2010 0:51:04 GMT -5
Thursday I went to my new sister apartment and installed it in her kitchen. Ceiling is 10'. That pic was taken before putting the light kit.  She needed light so I put the 4 spot light kit that came with it but there was no pull chain for the light kit, just an empty hole so I bought an on/off ceiling fan light kit pull chain and wired it up and still the light kit can not be turned off. Sigh, light kits are always a piece of trouble on fans. I need help here to know where to put the wires. Inside the center of the light kit there 3 set of wires. Two sets of white and one set of black. The light kit pull chain have 2 black wires. Again that is a 4 spot light kit so it have a lot of wires in it. Its not that easy. Surprisingly the light kit does not look as big s I thought it would for the proportion of the fan. Still ceiling fans smaller than 50'' need a 3 spot light kit to look more proportionate. I'm probably gonna try a balancer kit on it cause it still wobbles too much. I don't want to mess with the brackets(obviously not!) |
|
|
|
Post by JW on Aug 15, 2010 2:15:29 GMT -5
She needed light so I put the 4 spot light kit that came with it but there was no pull chain for the light kit, just an empty hole so I bought an on/off ceiling fan light kit pull chain and wired it up and still the light kit can not be turned off. Sigh, light kits are always a piece of trouble on fans. I need help here to know where to put the wires. Inside the center of the light kit there 3 set of wires. Two sets of white and one set of black. The light kit pull chain have 2 black wires. Again that is a 4 spot light kit so it have a lot of wires in it. Its not that easy. Surprisingly the light kit does not look as big s I thought it would for the proportion of the fan. Still ceiling fans smaller than 50'' need a 3 spot light kit to look more proportionate. I'm probably gonna try a balancer kit on it cause it still wobbles too much. I don't want to mess with the brackets(obviously not!) To add the pull chain switch: First off, is there a hole anywhere in the light kit for it to come out of? If so, continue: Each light should have a black wire and a white wire coming out of it. Bundle ALL of the white wires together with a wire nut. If there is not an extra white wire to hook to the fan, you will need to add one. Connect the loose end of the extra white wire to the white wire from the fan. Bundle ALL of the black wires together. You will not need an extra black wire. In addition to the black wires from the lights you will also need to cap ONE wire from the new pull chain to this group. It does not matter which one. The OTHER wire will connect to the blue wire coming from the fan. Unscrew the little brass cap from the light pull, stick the pull chain (and the plastic you took the cap off of) through the hole, and rescrew the cap back on. It should work now. Let me know if you have any questions. |
|
|
|
Post by Jean Lemieux on Aug 15, 2010 3:41:57 GMT -5
She needed light so I put the 4 spot light kit that came with it but there was no pull chain for the light kit, just an empty hole so I bought an on/off ceiling fan light kit pull chain and wired it up and still the light kit can not be turned off. Sigh, light kits are always a piece of trouble on fans. I need help here to know where to put the wires. Inside the center of the light kit there 3 set of wires. Two sets of white and one set of black. The light kit pull chain have 2 black wires. Again that is a 4 spot light kit so it have a lot of wires in it. Its not that easy. Surprisingly the light kit does not look as big s I thought it would for the proportion of the fan. Still ceiling fans smaller than 50'' need a 3 spot light kit to look more proportionate. I'm probably gonna try a balancer kit on it cause it still wobbles too much. I don't want to mess with the brackets(obviously not!) To add the pull chain switch: First off, is there a hole anywhere in the light kit for it to come out of? If so, continue: Each light should have a black wire and a white wire coming out of it. Bundle ALL of the white wires together with a wire nut. If there is not an extra white wire to hook to the fan, you will need to add one. Connect the loose end of the extra white wire to the white wire from the fan. Bundle ALL of the black wires together. You will not need an extra black wire. In addition to the black wires from the lights you will also need to cap ONE wire from the new pull chain to this group. It does not matter which one. The OTHER wire will connect to the blue wire coming from the fan. Unscrew the little brass cap from the light pull, stick the pull chain (and the plastic you took the cap off of) through the hole, and rescrew the cap back on. It should work now. Let me know if you have any questions. Thanks. Next time I got to my sister's apt I will try that. There is already a black wire comming out of the light kit along with the white(of course) so where does the second black wire from the pull chain goes? Do I twist it separated with the black wire that comes out of the light kit and goes to connect to the blue wire inside the switch housing? The way I put the wires is I put one of the black pull chain wire to to the set of black wires and the other black wire to one of the two sets of white wires. When I try to turn off the lights while they were on it made a little spark but the light did not shut off. Don't worry the lights still work well its just that they can not be turned off by the pull chain. In the meantime I told my sister to not pull the light kit pull chain, she knows it cannot be turn off and its not normal. I told her I will fix that next time I got to her place, I just did not had time to do all that the same day. I still wonder why when I got this fan there was no light kit pull chain to the light kit. There a hole for it but it was empty and inside the middle of the light kit I did not found any loose wires. The pull chain was obviously removed. But weird things like that are common with old used ceiling fans. It gonna be hard to twist all those white wires together they are so many of them, that's probably why I found them twisted in two separated sets. I will make sure to use the biggest kind of wire nut. |
|
|
|
Post by Cole S. on Aug 15, 2010 11:02:48 GMT -5
You ditch that extra black wire that's already coming out of the light kit (as in remove it, completely take it out of the black wire bundle). That wire is taking power directly to the black wires which you don't want because it's bypassing the pullchain. The second black wire on the pullchain goes to the blue in the fan's switch housing.
Yep, that's not right. You put all the white wires together like JW said, and have the one extra go to the white in the switch housing, the pullchain should not go to the white wires at all.
I'll maybe get some pics up for you, that may help clarify some things.
|
|
|
|
Post by JW on Aug 15, 2010 11:27:23 GMT -5
Thanks. Next time I got to my sister's apt I will try that. There is already a black wire comming out of the light kit along with the white(of course) so where does the second black wire from the pull chain goes? Do I twist it separated with the black wire that comes out of the light kit and goes to connect to the blue wire inside the switch housing? Yes. Connect one black wire from the pull chain to the black wire coming out of the light kit (you will need to open up the light kit and pull that black wire back through the top in order for the pullchain to be in the right place). Thread the other black wire from the pullchain through the top of the light kit and put it back together. Attach this new black wire to the blue wire from the fan. The way I put the wires is I put one of the black pull chain wire to to the set of black wires and the other black wire to one of the two sets of white wires. When I try to turn off the lights while they were on it made a little spark but the light did not shut off. Right. You never want to connect black wires to white wires as it will short out. You also need to make sure the wires on your pull chain aren't burnt up from the short the next time you mess with it. |
|
|
|
Post by Cole S. on Aug 15, 2010 12:50:02 GMT -5
I got a picture. You can't read the little speech bubbles, but I'll post them from left to right. "This goes through the top of the fixture to the white in the switch housing" "All four white wires bundled together, with an extra white to go to the switch housing" (Center bubble, for clarification I actually changed what I wanted to say for this post) "Only one white and one black wire should come through this hole to the switch housing, if you have more or less than five wires in either the white or black wire bundles there's something wrong, there should be exactly five wires in each" "All four black wires bundled together, with one pullchain wire tied in as well" "This pullchain wire (sometimes longer than the other) goes through the top of the fixture to the blue in the switch housing.  Hope we've helped. Sean has a good wire diagram elsewhere as well if you haven't seen that yet. |
|
|
|
Post by davidg on Aug 16, 2010 7:14:48 GMT -5
jean, check in your thread on d.t forum
sean made a very simple diagram
|
|


 ;D Nice job, Jean!